Tips for shooting outdoor Christmas light photos
By Jake Davies - West Carleton Online
WEST CARLETON – There are currently three, count them, three Christmas lights competitions running in West Carleton as you read this. Surely you can find one to enter (here, here and here).
But, if you have ever tried, you already know getting that perfect, prize-winning outdoor evening photo isn’t as easy as it sounds. And it doesn’t sound easy.
West Carleton Online really wants you to win that decorating contest. We’ve had years and years and years of taking outdoor evening photos of lights, so we are happy to present you with some tips to doing just that.
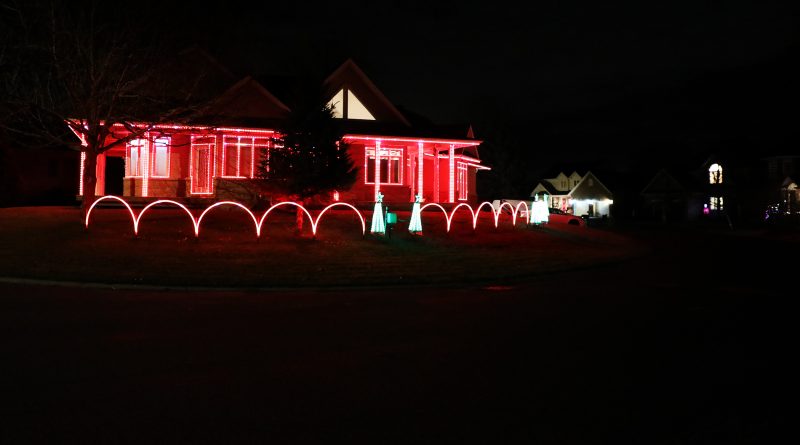
Night photography is tricky. When it’s pitch-black outside, your camera can either properly expose for the lights or for the lights’ surroundings. If the camera exposes for the lights, they’ll look like they’re floating in nothingness. If it exposes for the surroundings, the lights will be completely washed out, almost colorless.
Photograph around twilight/dusk. For a few minutes, the atmospheric light will perfectly complement the continuous artificial lights. You’ll pick up the beautiful ambient colors of the sky and surroundings and get much more photographic texture than the flat blackness. Expose for the lights, not the sky. That way, the sky’s ambient light will come in to complement the lights, which can remain your focus.
Act fast. Time is of the essence — if you’ve tried to photograph a sunset, you know how quickly the light changes. Between sunset and nightfall, each minute will bring slightly different lighting conditions. This means you have plenty of opportunity to capture a variety of scenes, but not a lot of actual time.
Use a tripod. Without it, you’ll probably end up sacrificing a lot of image quality because of slow shutter speeds. So, unless you’ve got superhuman steadiness, bust out the tripod. It’s the only way to guarantee a crisp shot for your long exposures.
Forget flash. You’re trying to capture the color of the lights, and even if they aren’t multicolored, your flash could interfere with the lights’ color profile, or wash out the light they are emitting all together. Unless you have an incredibly powerful flash or are very close to your subject, the flash isn’t likely to contribute much to the exposure anyway. Bottom line: keep the flash off.
Start with the ISO at around 400. If your photos are too dark, increase it, but know that any increase to the ISO will degrade image quality. It may not be enough to notice, but you’ll get technical degradation nonetheless. Any time you’re on a tripod, go all out with the lowest ISO possible. Low ISO means higher quality, because if you use a super high ISO, your image will be grainy.
Set your aperture for f/8. This is a good starting point if you’re following our previous suggestions. Remember: lower numbers let in more light, and higher numbers let in less.
Go for an incandescent white balance (your camera might call it Tungsten, but they’re the same thing). The lights you’re photographing are likely incandescent bulbs, so the incandescent setting will faithfully render the color of your lights. If you need more light, increase the exposure time (slow shutter speed) instead of increasing the ISO. This prevents the grain that would’ve been introduced by the higher ISO, but it leaves your photo vulnerable to blurry moving subjects (kids, flying reindeer, trees in the wind). Plus, long exposure captures the full glory of the light display.
Fill your frame. Fill it with everything you’re trying to capture, including some negative space or reflective surfaces. Snow, water, or even wet concrete will take your photos up a notch by softly reflecting your lights. For blinking lights, make sure that you increase your shutter speed to capture the full light cycle (if you’re in Shutter priority mode, you won’t have to worry about adjusting your other exposure settings accordingly).
Note: a bonus to the Incandescent setting is that it gives your ambient sky the gorgeous blue tones of the ever-popular blue hour.
Want your lights to look warmer? Incandescent lights shot with your white balance set to Daylight will make the lights look more orange. If your holiday lights are LED or full spectrum and you set your white balance to Incandescent, then the lights in the photo will look more blue than your eye perceived them. LEDs can be weird and inconsistent, so we recommend trying the AWB (Auto White Balance) setting.
We know not everyone has a camera with theses settings easily accessible. In fact, were willing to bet a subscription most will be taking their photos with their cell phone. You can still take great photos with a cell phone and here are some tips to do that.
Getting a good shot in low light usually requires lengthening the exposure, which leads to blurriness from you or your subject moving. Taking shots too quickly results in under-exposed images.
Of course, you could pop the flash, but you’d also succeed in killing the atmosphere of the shot. So, take your phone’s camera out of “Auto” mode and follow these tips to taking great photos in low light.
Raise the ISO Level. Your camera’s ISO setting lets you adjust how sensitive the camera is to light. The higher the ISO, the faster the camera sees the scene with the available light. So, you can take photos faster, which reduces the blur caused by camera shake.
It would be great if all you had to do is crank up the ISO. But there are trade-offs as you boost the ISO to top of the camera’s range. Yes, you can get the shot, but you’ll also pick up noise, that grainy-looking texture you see most noticeably in solid-colored areas of pictures. You’ll want to play around with the ISO settings to see where the noise negates the value of the low-light details possible with high ISO shots. Most devices will take decent shots until at least 800 ISO.
Try HDR Mode. Some phones come with a mode called HDR, or high dynamic range. In this mode the camera takes two or three shots at different exposures and merges them together to get detail in the brightest and darkest areas of the shot. Because the camera is taking a few shots, it’s important that nothing changes between each shot or the resulting image will be blurry. So reserve HDR mode for landscapes and group shots.
Use the Camera’s Self-Timer. While you may not be able to hold a phone still long enough to take a blur-free shot at the proper exposure, a tripod, table or bookshelf has no such problem. So, try setting your phone down and turning on the self-timer. The camera will automatically choose the proper exposure–you just need to remind everyone to stand still.
Stabilize Yourself. Bracing yourself or the phone against something solid can lengthen the time you can hold your phone still and thus enable you to increase the exposure time. Use the self-timer to prevent that small jiggle that often occurs as you hit the shutter button.
Optimize flash results. Using the flash should be a last resort. If you’re looking to capture the mood of an event. But getting a shot with a flash is certainly better than no shot at all. Try standing several feet away from your subject to lower the glare.


